Disclaimer
In this guide, I will use Fedora 41 Cloud Edition as the base operating system. Some steps may vary depending on the distribution you are using.
This guide is similar to the [[devops/vanilla_kubernetes_setup_with_tailscale |Vanilla Kubernetes Setup with Tailscale]] guide. It differs from the other guide only in a few steps.
Introduction
- K0s is a lightweight, easy-to-use Kubernetes distribution that is designed for developers and small teams. It is a single binary that can be installed on any Linux machine and provides a simple way to set up a Kubernetes cluster.
- Tailscale is a virtual private network (VPN) service that facilitates secure access to a network from any location worldwide. The configuration process is straightforward and the software is compatible with a range of operating systems, including Windows, macOS, Linux, iOS and Android.
- This guide will demonstrate the process of establishing a basic K0s Kubernetes cluster using the Tailscale VPN infrastructure.
Prerequisites
- A Tailscale account
- Two or more machines with a minimum of a 2-core CPU and 4 GB of RAM, running a Linux operating system.
I will use the following machines:
- Master Node:
- Hostname: m1.srv.mtaha.dev
CPU: Intel(R) Celeron(R) N3450 (4) @ 2.20 GHz (x86_64)
RAM: 8 GB
OS: Fedora 41 Cloud Edition
Location: Homelab
Machine: Zimaboard 832- Worker Node 1:
- Hostname: w1.srv.mtaha.dev
CPU: Intel Xeon (Skylake, IBRS, no TSX) (4) @ 2.10 GHz (x86_64) [Upgraded today]
RAM: 8 GB [Upgraded today]
OS: Fedora 41 Cloud Edition
Location: Hetzner Cloud
Machine: CX32 [Upgraded today]- Worker Node 2:
- Hostname: w2.srv.mtaha.dev
CPU: ARM Cortex-A76 (4) @ 2.40 GHz (aarch64)
RAM: 8 GB
OS: Fedora 41 Cloud Edition
Location: Homelab
Machine: Raspberry Pi 5 - 8 GB
Step 1: Install Tailscale
-
Install Tailscale on all machines where Kubernetes will be installed. Use the following script to automate the Tailscale installation process on machines:
curl -fsSL https://tailscale.com/install.sh | sh -
Once Tailscale has been installed, use the following command to authenticate it:
sudo tailscale up -
The command will provide you with a URL. Open the URL in your browser and authenticate your machine.
Step 2: Set up Tailscale ACL
-
The next step is to configure the Tailscale ACL (access control list) to allow communication between machines in your Kubernetes cluster. You can edit the ACL list from this link. I recommend that you use the following ACL list:
{ "tagOwners": { "tag:personal": ["autogroup:admin"], "tag:servers": ["autogroup:admin"], "tag:k8s-operator": ["autogroup:admin"], "tag:k8s-node": ["tag:k8s-operator"], "tag:k8s-pods": ["tag:k8s-operator"], }, "acls": [ { "action": "accept", "src": ["tag:personal"], "dst": ["*:*"], }, { "action": "accept", "src": [ "autogroup:admin", "tag:servers", "tag:k8s-node", "tag:k8s-pods", "tag:k8s-operator", "10.0.0.0/8", "172.16.0.0/16", ], "dst": [ "tag:servers:*", "tag:k8s-node:*", "tag:k8s-pods:*", "tag:k8s-operator:*", "10.0.0.0/8:*", "172.16.0.0/16:*", ], }, ], "ssh": [ { "action": "accept", "src": ["autogroup:admin", "tag:personal"], "dst": ["tag:servers"], "users": ["autogroup:nonroot", "root", "fedora"], }, ], } -
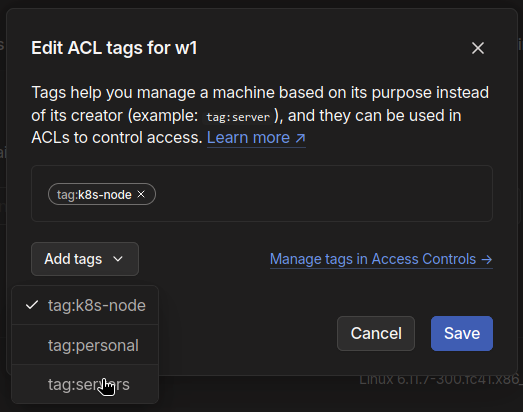
After configuring the ACL list, you can apply the ACL tags to the machines in the main Tailscale dashboard.
Select the machine > click on the ellipsis and select Edit ACL Tags > add the tags ‘servers’ and ‘k8s-node’ to the Kubernetes nodes.
Step 3: Set up Hostname and Hosts File
-
The next step is to set up the hostname and hosts file on all the machines. This can be done by editing the
/etc/hostnameand/etc/hostsfiles on each machine. In newer distributions, thehostnamectlcommand can be used to set the hostname.sudo hostnamectl set-hostname <hostname>
-
Then edit the
/etc/hostsfile. Add the following lines for the per machine:127.0.0.1 <hostname> ::1 <hostname>Note
Replace
<hostname>with the hostname of the machine.
Step 4: Set up FirewallD rules
-
The next step is to configure the FirewallD rules on all the machines. To do this, run the following commands:
#~ flush all rules
sudo iptables -F

#~ add tailscale and kubernetes cni interfaces
sudo firewall-cmd --zone=trusted --permanent --add-interface={tailscale0,cni0,vxlan.calico,flannel.1,cali+}

#~ add ports for kubernetes
sudo firewall-cmd --zone=public --permanent --add-service={dns,http,https,mdns,llmnr}

#~ enable masquerade and forwarding
sudo firewall-cmd --permanent --add-forward
sudo firewall-cmd --permanent --add-masquerade

#~ reload firewall
sudo firewall-cmd --reload
Step 5: Enable CGroup and Disable Swap
-
The next step is to enable CGroup and disable swap on all the machines. CGroup is a Linux kernel feature that provides a way to limit, account for, and isolate the resource usage of a collection of processes. To enable CGroup and disable swap, look at the following steps:
-
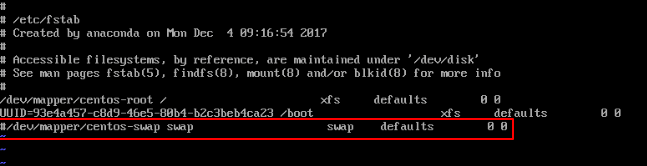
If you are using swap (not zram), you need to disable it by running the following commands:
sudo swapoff -a sudo vim /etc/fstab #~ comment the swap line-
Example:
-
-
For GRUB users:
-
Open the
/etc/default/grubfile and change the following line:GRUB_CMDLINE_LINUX="cgroup_enable=memory systemd.zram=0"
-
-
For systemdboot users:
-
Open the
/etc/kernel/cmdlinefile and add the following lines:cgroup_enable=memory systemd.zram=0
-
-
For Raspberry Pi users:
-
Open the
/boot/cmdline.txtfile and add the following lines:cgroup_enable=memory systemd.zram=0
-


Step 6: Enable IP Forwarding and Load Required Modules
-
The next step is to enable IP forwarding on all the machines. To do this, follow the steps below:
-
Open the
/etc/sysctl.d/kubernetes.conffile and add the following lines:net.bridge.bridge-nf-call-ip6tables = 1 net.bridge.bridge-nf-call-iptables = 1 net.ipv6.conf.all.forwarding = 1 net.ipv4.conf.all.src_valid_mark = 1 net.ipv4.ip_forward = 1
-
Then run the following command to apply the changes:
sudo sysctl --system -
After that, we need to load the some required kernel modules. Create a file named
/etc/modules-load.d/kubernetes.confand add the following lines:br_netfilter overlay
Step 7: Update System Packages
-
The next step is to update the system packages on all the machines. To complete this step, run the following commands:
# For Ubuntu/Debian
sudo apt update && sudo apt upgrade -y

# For CentOS/RHEL
sudo dnf --refresh update -y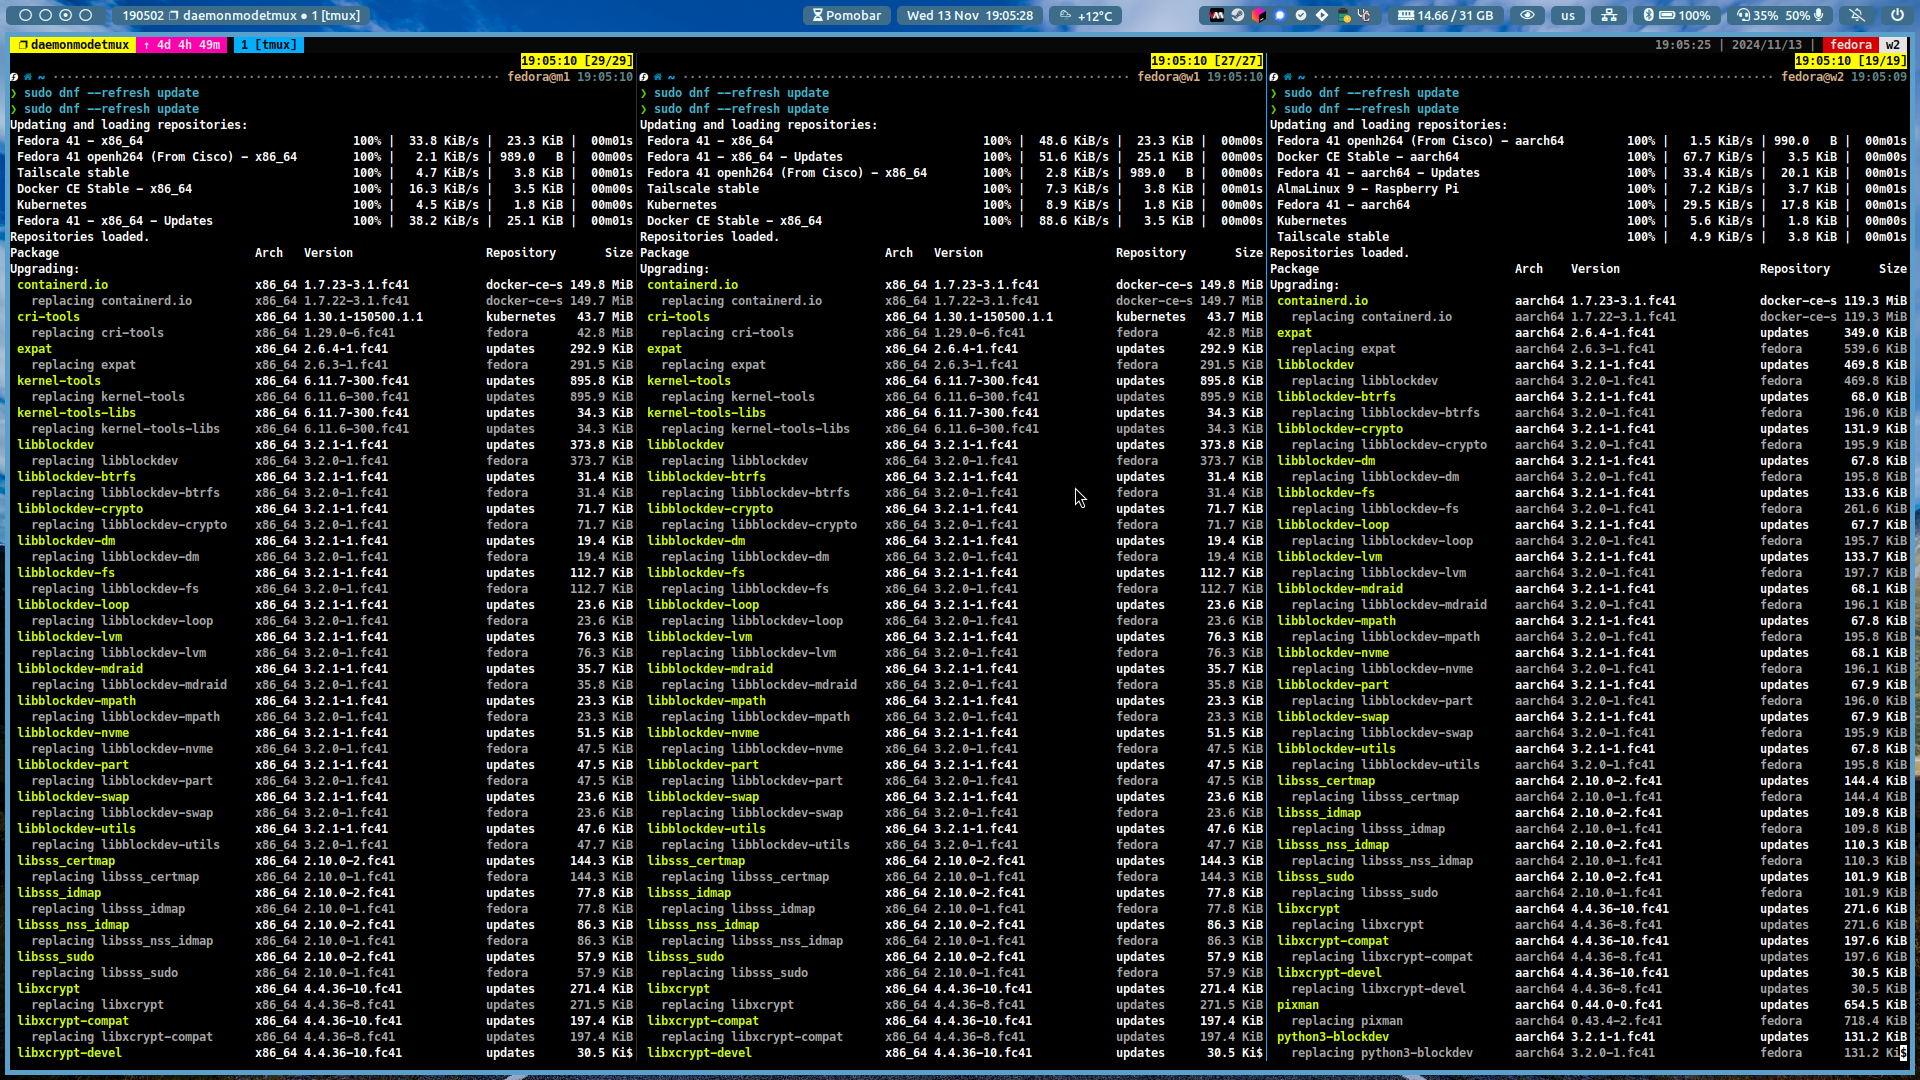
Step 8: Regenerate Initramfs and Apply Bootloader Configuration
-
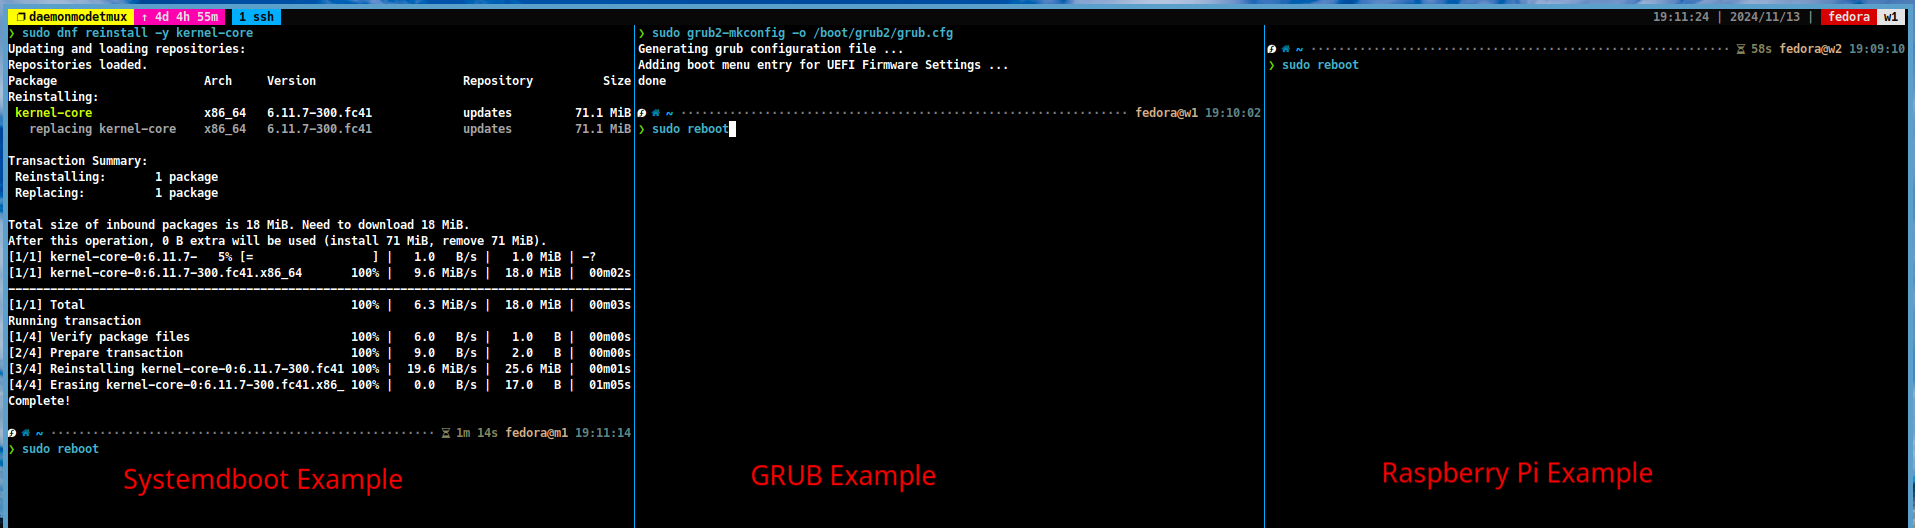
In the next step, you need to regenerate the initramfs and apply the bootloader configuration to all the machines. You can do this by running the following commands:
-
For GRUB users:
# For Ubuntu/Debian sudo update-initramfs -u sudo update-grub # For CentOS/RHEL sudo dracut -fv sudo grub2-mkconfig -o /boot/grub2/grub.cfg -
For systemdboot users:
# For Ubuntu/Debian
sudo update-initramfs -u
sudo systemctl restart systemd-boot-update

# For CentOS/RHEL
sudo dracut -fv
sudo dnf reinstall -y kernel-core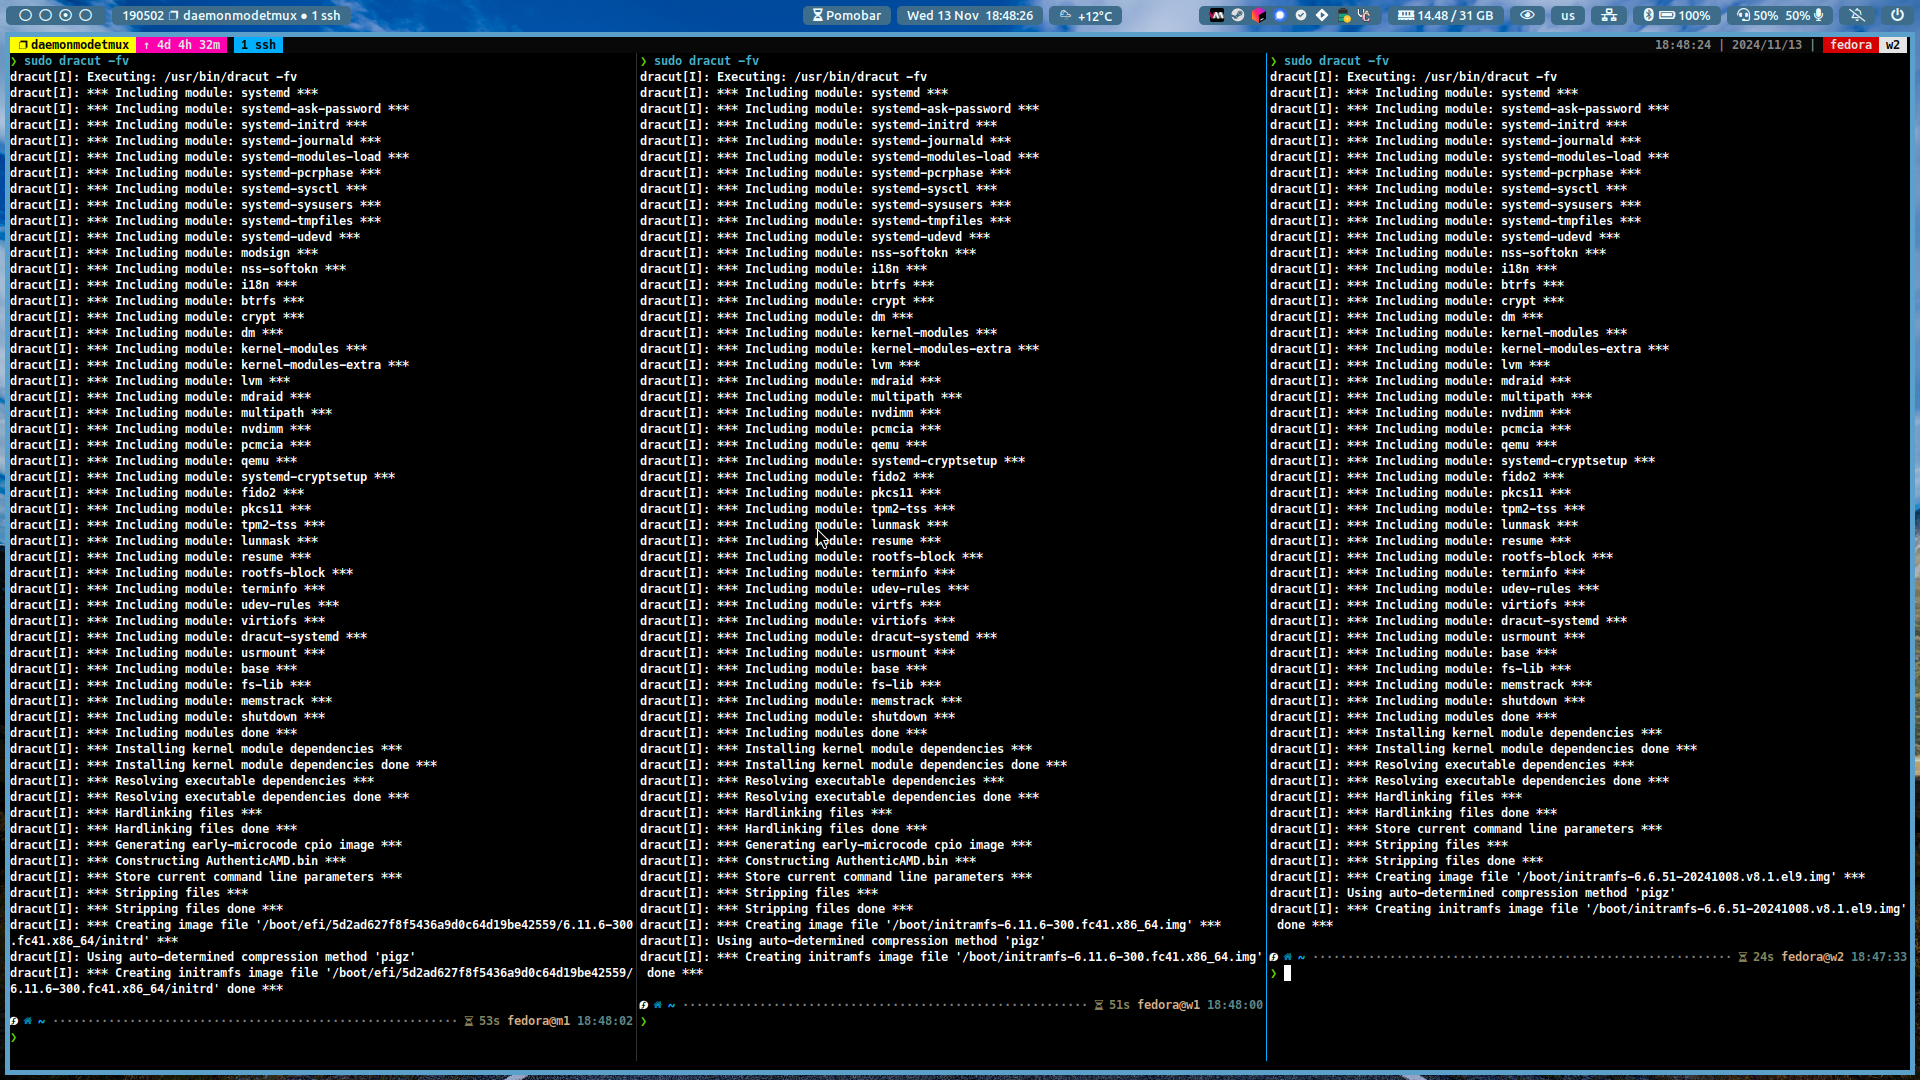
Step 9: Verify the Changes
-
You can verify the changes by running the following commands:
# Check the swap/zram status (if output is empty, it means swap/zram is disabled)
swapon
zramctl

# Check the CGroup status
cat /proc/cgroups

Optional Step: Install K9s CLI
- K9s is a powerful CLI tool that provides a terminal-based interface for managing Kubernetes clusters. You can install K9s by following the steps in the official K9s documentation.
Step 10: Set up K0s and K0sctl
-
In this step, you will set up the K0s binaries on your computer (not the servers). You can install k0s by running the following commands:
curl -sSLf https://get.k0s.sh | sudo sh -
Once the installation is complete, you can install
k0sctlby running the following commands:#~ find your k0sctl version (distro + architecture) curl -sSLf https://api.github.com/repos/k0sproject/k0sctl/releases/latest | jq -r '.assets[].browser_download_url' #~ download k0sctl sudo wget <URL> -O /usr/local/bin/k0sctl sudo chmod +x /usr/local/bin/k0sctl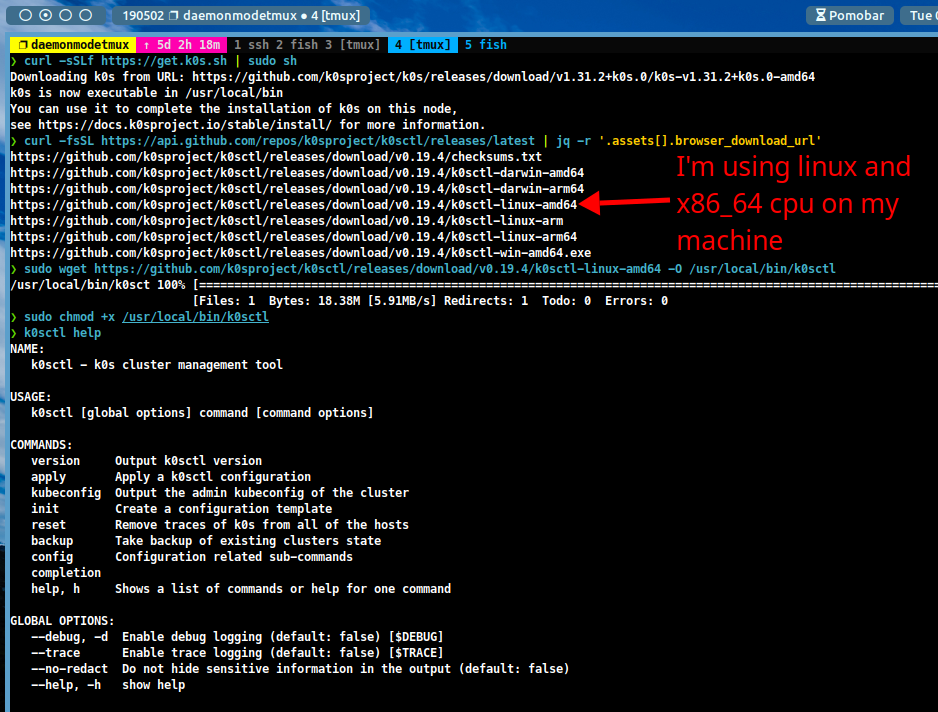
Step 11: Set up K0SCTL Init File
-
In the next step, you can create a K0sctl init file to define the cluster configuration. You can create the file by running the following command:
vim k0sctl.yaml -
Then add the following content to the file:
apiVersion: k0sctl.k0sproject.io/v1beta1
kind: Cluster
metadata:
  name: k0s-cluster
spec:
  hosts:
  - ssh:
      address: 1.2.3.4                                  # Write the IP address of the master node here (tailscale ip --4 m1)
      user: root
      port: 22
      keyPath: null
    role: controller+worker
    privateInterface: tailscale0
    installFlags:
      - '--kubelet-extra-args=\"--node-ip=1.2.3.4\"'    # Write the IP address of the master node here (tailscale ip --4 m1)
   - ssh:
      address: 2.3.4.5                                  # Write the IP address of the worker node 1 here (tailscale ip --4 w1)
      user: root
      port: 22
      keyPath: null
    role: worker
    privateInterface: tailscale0
    installFlags:
      - '--kubelet-extra-args=\"--node-ip=2.3.4.5\"'    # Write the IP address of the worker node 1 here (tailscale ip --4 w1)
  - ssh:
      address: 3.4.5.6                                  # Write the IP address of the worker node 2 here (tailscale ip --4 w2)
      user: root
      port: 22
      keyPath: null
    role: worker
    privateInterface: tailscale0
    installFlags:
      - '--kubelet-extra-args=\"--node-ip=3.4.5.6\"'    # Write the IP address of the worker node 2 here (tailscale ip --4 w2)
  k0s:
    version: 1.33.2+k0s.0
    config:
      apiVersion: k0s.k0sproject.io/v1beta1
      kind: Cluster
      metadata:
        name: k0s
      spec:
        api:
          address: 1.2.3.4                              # Write the IP address of the master node here (tailscale ip --4 m1)
          k0sApiPort: 9443
          port: 6443
        installConfig:
          users:
            etcdUser: etcd
            kineUser: kube-apiserver
            konnectivityUser: konnectivity-server
            kubeAPIserverUser: kube-apiserver
            kubeSchedulerUser: kube-scheduler
        konnectivity:
          adminPort: 8133
          agentPort: 8132
        network:
          kubeProxy:
            disabled: false
            mode: iptables
          kuberouter:
            autoMTU: true
            mtu: 0
            peerRouterASNs: ""
            peerRouterIPs: ""
          podCIDR: 172.16.0.0/16
          provider: calico
          calico:
            mode: vxlan
            envVars:
              FELIX_IPTABLESMARKMASK: "0xff00ff00"
              IP_AUTODETECTION_METHOD: "interface=tailscale0"
          serviceCIDR: 10.96.0.0/12
        podSecurityPolicy:
          defaultPolicy: 00-k0s-privileged
        storage:
          type: etcd
        telemetry:
          enabled: false
Note
If you are using systemd-resolved, you need append to the
kubelet-extra-argsthe following line:--resolv-conf=/run/systemd/resolve/resolv.conf.
For example:--kubelet-extra-args=\"--node-ip=<IP_ADDRESS> --resolv-conf=/run/systemd/resolve/resolv.conf\"
Step 12: Initialize K0s Cluster
-
In the next step, you can initialise the K0s cluster by running the following command:
k0sctl apply --config k0sctl.yaml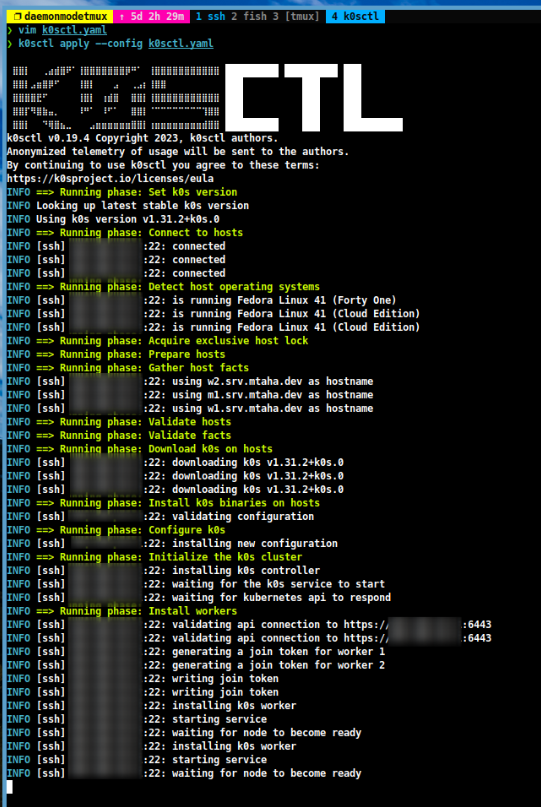
-
After the initialisation process is complete, run the following commands to set up the Kubernetes configuration file:
mkdir -p $HOME/.kube
k0sctl kubeconfig --config k0sctl.yaml > $HOME/.kube/config
sudo chmod 0700 $HOME/.kube/config
Step 13: Install Helm Package Manager in Master Node
-
In the next step, install the HELM package manager in the master node. HELM is a package manager for Kubernetes that allows you to deploy and manage applications on your Kubernetes cluster. You can install HELM by running the following commands:
curl https://raw.githubusercontent.com/helm/helm/main/scripts/get-helm-3 | bash
Step 14: Install MetalLB Load Balancer
-
The next step is to install the MetalLB load balancer on the Kubernetes cluster. MetalLB is a load balancer that provides network load balancing for Kubernetes clusters. You can install MetalLB by running the following steps:
-
Create a file with the name `metallb.yaml’ and add the following content:
apiVersion: metallb.io/v1beta1
kind: IPAddressPool
metadata:
  name: default
  namespace: metallb-system
spec:
  addresses:
  - 172.16.20.0/24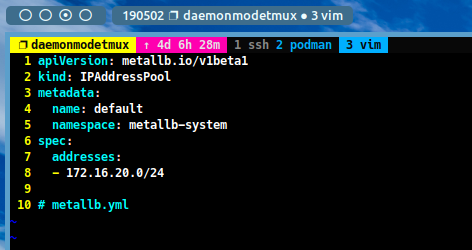
-
Install MetalLB by Helm with the following command:
helm repo add metallb https://metallb.github.io/metallb
helm install metallb metallb/metallb --namespace metallb-system --create-namespace

until $(kubectl get pods -n metallb-system --no-headers | awk '{print $3}' | uniq | grep -q 'Running'); do
  echo "Waiting for MetalLB pods to be in Running state..."
  sleep 5
done

kubectl apply -f metallb.yaml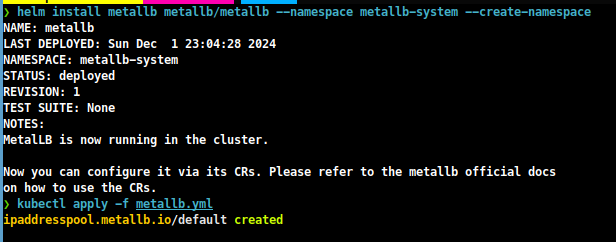
-
Verify the MetalLB installation by running the following command:
kubectl get pods -A

# or use k9s cli
k9s
Step 15: Install local-path-provisioner Storage Class
-
Finally, you can install the local-path-provisioner storage class on the Kubernetes cluster. The local-path-provisioner is a storage class that provides persistent storage for the containers running on the cluster. You can install the local-path-provisioner by running the following steps:
-
Install the local-path-provisioner with the following command:
# Install local-path-provisioner
kubectl apply -f https://raw.githubusercontent.com/rancher/local-path-provisioner/v0.0.28/deploy/local-path-storage.yaml

# Patch the local-path storage class
kubectl patch storageclass local-path -p '{"metadata": {"annotations":{"storageclass.kubernetes.io/is-default-class":"true", "defaultVolumeType":"local"}}, "allowVolumeExpansion": true}'
-
Verify the local-path-provisioner installation by running the following command:
kubectl get pods -A

# or use k9s
k9s
Conclusion
- In this guide, I’ve shown you how to set up a K0s Kubernetes cluster using the Tailscale VPN infrastructure. Tailscale is a secure and easy to use VPN service that provides secure access to your network from anywhere in the world. K0s is a lightweight Kubernetes distribution that is designed for developers and small teams. By following the steps in this guide, you can set up a K0s Kubernetes cluster on your own machines and start deploying containerised applications.